I photograph buildings at night. It's my weekend ritual — a camera, a tripod, and hours wandering Houston neighborhoods looking for light done well. I've also seen light done terribly, and the worst offenders are almost always residential outdoor fixtures. Security floods aimed at the street. Path lights with bare bulbs visible from three houses down. Trees lit from below with 4000K cool-white spots that make a century-old live oak look like a gas station at midnight.
Outdoor lighting serves three purposes: safety, navigation, and beauty. When it's done wrong, it serves a fourth: irritating everyone within a hundred yards. The good news is that the same layering principles that work inside your home also work outside it — with a few outdoor-specific rules that make the difference between a home that glows and a home that glares.
Start with the Right Color Temperature
Outdoor color temperature is not a creative choice. It's a biological and environmental one. The wrong Kelvin number doesn't just look bad — it disrupts wildlife, contributes to light pollution, and makes your home feel institutional.
Why 2700K Is the Outdoor Ceiling
For residential outdoor lighting, 2700K is the maximum. Many lighting designers prefer 2400K or even 2200K for landscape applications — warmer, amber-toned light that reads as moonlight or firelight. The International Dark-Sky Association recommends 3000K or lower for outdoor fixtures, and for residential settings, 2700K and below creates the most inviting atmosphere while minimizing blue-spectrum light that scatters in the atmosphere and obscures the night sky.
Anything above 3000K outdoors feels commercial. A 4000K floodlight on a home's facade reads as a loading dock, not a front porch. I covered color temperature in detail in an earlier post — the same physics applies outside, but the stakes are higher because your neighbors have to look at it too.
Three Fixtures, Three Rules
Most residential outdoor lighting plans need three fixture types: path lights, uplights, and wall washes. Each has a rule that prevents it from becoming a nuisance.
Path Lights: Aim Down, Shield the Bulb
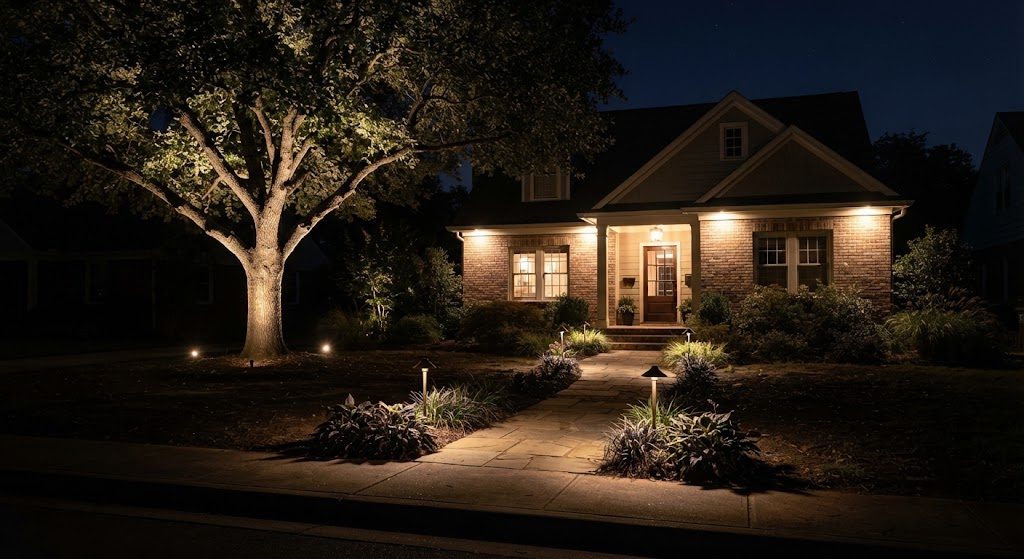
Path lights illuminate walkways so people don't trip. Their job is to cast light onto the ground — not into eyes, not into the sky. Look for path lights with a solid top cap and a fully shielded bulb. From any standing or seated position on your property or your neighbor's, you should see the illuminated path surface, not the light source itself. If you can see the bulb from across the yard, the fixture is poorly designed or incorrectly mounted.
Space path lights farther apart than the box suggests. A common mistake is lining them up every four feet like airport runway lights. Place them where the path changes direction, where there's a step, or where the walking surface transitions from concrete to grass. Let the pools of light overlap slightly, but don't turn your walkway into a landing strip.
Tree Uplights: Keep the Beam in the Canopy
Uplighting a mature tree is one of the most dramatic things you can do with outdoor light — and one of the easiest to get wrong. A wide-flood uplight placed too far from the trunk spills light past the canopy into the sky. A narrow-spot uplight placed directly against the trunk creates a harsh vertical stripe and misses the branching structure.
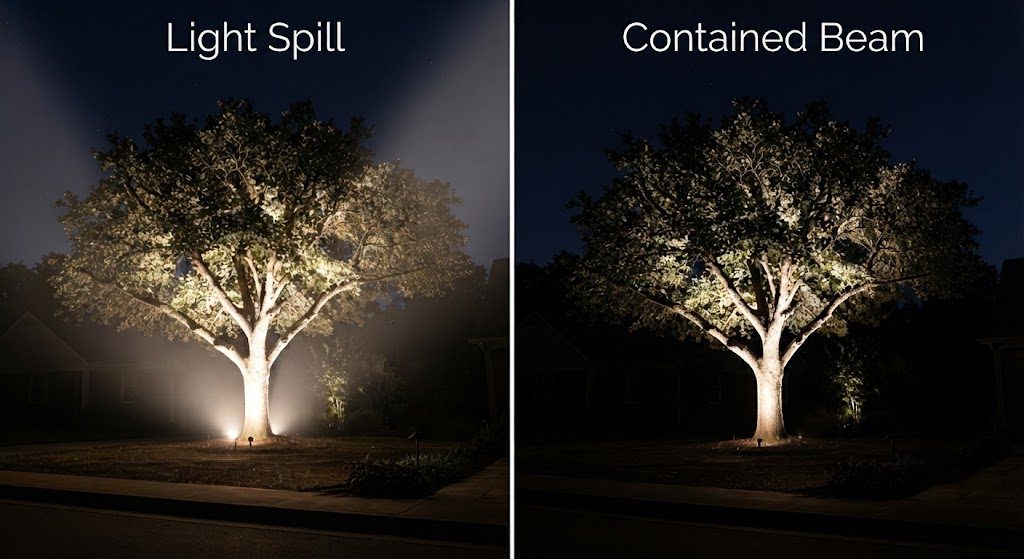
Position one or two uplights at the drip line — the outer edge of the canopy — and aim them into the branches at roughly a 30-degree angle. Use a narrow beam, 15 to 25 degrees, to keep the light contained within the tree's structure. The goal is to light the tree, not the sky behind it. If the tree is close to a neighbor's property, skip it entirely or use a very tight beam aimed away from their windows.
Wall Wash: Light the House, Not the Street
A wall-wash fixture mounted at the base of your home's facade, aimed upward, creates an even glow across the surface. This is how well-lit houses in architectural photography look inviting rather than blasted. The fixture should sit close to the wall — 6 to 12 inches — and throw a wide, even beam upward. The light should stop at the roofline. If it's spilling onto the roof or into the sky, the fixture is too far from the wall or the beam angle is too wide.
The Dark-Sky Principle
The Dark-Sky movement isn't about turning off outdoor lights. It's about aiming them responsibly. The principle is simple: no light above horizontal. Every fixture on your property should direct its output downward or at a specific surface — never into open air where it contributes to sky glow and never across property lines into a neighbor's bedroom.
Look for fixtures with the Dark Sky Approved label from the International Dark-Sky Association. These have been tested to ensure zero uplight. Many municipalities are beginning to require dark-sky-compliant fixtures in new construction. Even if yours doesn't, the standard is worth following voluntarily — it's the difference between being a good neighbor and being the reason someone posts on the neighborhood forum.
Your outdoor lighting plan should make your home feel welcoming after sunset while remaining nearly invisible to anyone not standing on your property. That's not a compromise. That's the standard.