
Kitchen lighting is one of those projects that can make a remodel feel finished or make an expensive room look strangely flat. I see it all the time: beautiful cabinets, a pricey stone island, and then a single ceiling fixture doing every job at once. That setup leaves shadows on the counter, glare in your eyes, and a room that looks better in daylight than it does at 8 p.m. The fix is not buying fancier pendants. The fix is thinking about what the room actually needs from light, hour by hour.
The best plan starts with three jobs. First, general illumination so you can move around safely. Second, task light where you chop, read a recipe, wash dishes, and load the oven. Third, a little visual comfort so the room feels finished instead of harsh. When those layers work together, kitchen lighting stops being a collection of fixtures and starts acting like a system. That is why a room can feel calm and expensive with modest fixtures, while another room filled with trendy pieces still feels wrong.
Why kitchen lighting fails when it tries to do everything
A good kitchen lighting plan usually fails because the ceiling is doing too much. Recessed cans can provide even light, but if they are the only source, they flatten the room and cast your own body shadow onto the counter. One decorative pendant over an island may look nice in photos, but it rarely lights the work surface evenly by itself. If the sink, range, and prep area all depend on the same ceiling source, you end up turning on every light just to make dinner.
The answer is layering. Use the ceiling for broad coverage, then add dedicated task light where people actually stand. Under-cabinet LEDs are the easiest win because they put light directly on the counter, not from behind your shoulders. Pendants can still be useful, especially over an island, but they should support the room rather than carry it. In kitchen lighting, the goal is not brightness for its own sake. It is the right light in the right place.
Layer the room instead of relying on one fixture
Think of the room in zones. The perimeter cabinets want continuous under-cabinet light, ideally with a high-quality LED strip or bar mounted toward the front edge so the counter is evenly lit. The island wants a separate circuit or dimmed pendants if it is used for prep and homework. The general ceiling layer should fill in the gaps without creating hot spots on glossy quartz or polished tile. If you have a pantry or tall cabinet run, a small interior light or toe-kick detail can make the room easier to use at night.
A dimmer is not optional. It is what lets the same room work for breakfast, cooking, and late-night cleanup. I often specify dimming on every practical layer so the owner can pull the room down after dinner without losing enough light to trip over a backpack. If you are renovating, ask for each layer on its own switch. That control matters more than a decorative finish once the room is actually in use.
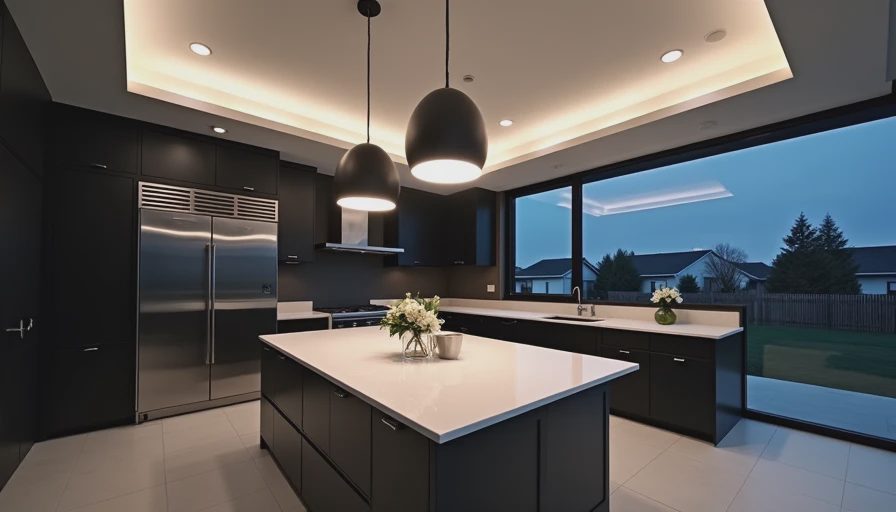
Color temperature and CRI are the quiet details that make or break the room
This is where many homeowners get tripped up. Color temperature is the warmth or coolness of the light, measured in Kelvin. For most homes, 2700K to 3000K is the sweet spot. Lower than that can feel a little sleepy for a kitchen, and higher than that can make wood cabinets and skin tones look colder than expected. If the house already has warm daylight from nearby rooms, 3000K usually blends better. If the kitchen opens into a brighter, cleaner modern space, 3000K still works well because it stays neutral enough for food and surfaces.
CRI, or color rendering index, is just a way of describing how accurately light shows color. For a kitchen, I like 90 plus whenever possible. Tomatoes look like tomatoes, not brick orange. White countertops stay clean instead of muddy. Cabinet paint reads the way it was chosen. Good kitchen lighting is not only about seeing where the knife goes. It is also about making the room feel truthful.
Where kitchen lighting should land in a working room
Placement matters more than fixture count. Recessed lights should not be centered blindly in the ceiling grid if that puts them directly over your shoulders at the counter. They work better when they are aligned to the work zones below. Over an island, pendants are usually best spaced so the light falls along the full length of the surface instead of bunching at the ends. Over a sink, a small downlight or carefully placed ceiling light can keep the bowl visible without putting your head in shadow.
A common mistake is putting fixtures wherever framing or a joist happens to allow it, then hoping trim styles will solve the problem. They will not. Good kitchen lighting is about aiming light where the hands work and where the eyes need comfort. Even a modest remodel can feel custom when the layers are placed with that logic.
A real-world example from a Houston remodel
On a recent project, a homeowner had a 12-by-14 kitchen with white shaker cabinets, an island, and plenty of daylight during the afternoon. At night, though, the room turned muddy because the original plan relied on four ceiling downlights and a single decorative pendant. The counters were dim, the island threw shadows, and the sink area felt isolated. The family kept saying the room looked finished in photographs but wrong in daily life, which is a classic sign that kitchen lighting was designed for the camera, not the cook.
We corrected it with three moves. First, we added continuous under-cabinet lighting across the perimeter. Second, we adjusted the ceiling layer so the downlights supported the work zones instead of sitting in the middle of open floor. Third, we put the island on its own dimmed circuit so it could feel social at dinner and functional during prep. Nothing exotic changed, but the room stopped fighting itself. That is the part people notice: less glare, fewer shadows, and a space that feels easier to live in.

A simple checklist before you buy fixtures
Before you order anything, measure the room, note the cabinet runs, and think about how the kitchen is used after dark. If someone cooks most nights, task light deserves more attention than decorative accents. If the island doubles as a homework station, the light needs to stay comfortable for long stretches, not just look good for ten minutes. If you have dark flooring or a lot of matte finishes, the room will absorb more light and may need a stronger ambient layer than you expected. Those details are why one-size-fits-all fixture shopping usually disappoints.
If you are choosing between a quick upgrade and a full lighting plan, start with the layers that solve real problems first: under-cabinet light, dimming, and thoughtful placement. Then use pendants or decorative pieces to add character. That order saves money and gives you a better result. If you are planning a remodel in Houston or anywhere else and want a second set of eyes before drywall closes, bring in a lighting designer early. It is much cheaper to move a light on paper than to live with the wrong one for ten years.