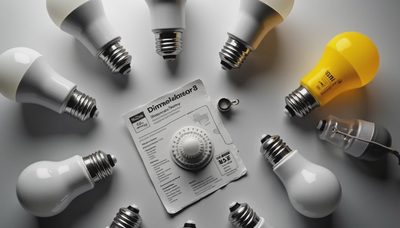
A dimmer switch is one of the simplest ways to improve how your home feels after sunset. It lets you adjust brightness instead of treating every room like an office with one fixed light level. In my residential lighting work, I often find that homeowners do not need more fixtures first; they need better control of the fixtures they already own.
The important detail is compatibility. A dimmer switch, light source, and fixture work as a system. Pair the wrong control with an LED lamp and you can get flicker, buzzing, a narrow dimming range, or lights that refuse to turn off completely. Choose the system deliberately, and the same room can support cooking, conversation, reading, and winding down.
What a dimmer switch actually changes
A standard wall switch simply opens or closes the electrical circuit. A dimmer switch changes how much power reaches the light, usually by rapidly interrupting the alternating-current waveform. Your eyes perceive the resulting average output as a lower light level. Modern electronic controls perform this job far more smoothly than older controls designed for incandescent bulbs.
That distinction matters because an incandescent lamp responds naturally to reduced power. An LED lamp contains electronic components, often called a driver, that convert incoming electricity into the current its diodes need. The driver has to understand the dimmer's signal. If it does not, the light may shimmer, drop out below 30 percent, or produce an audible hum.
Dimming also changes the visual character of a room. Lowering a warm-white lamp in the evening can make a living room feel calmer, while full output provides useful task light for cleaning or reading. The control is not merely an energy-saving accessory; it is a way to match light to the activity.

Match the control to the bulb and fixture
Start with the lamp label or fixture specifications. Look for language such as dimmable LED, ELV compatible, MLV compatible, or phase-cut compatible. “Dimmable” by itself is useful, but it does not always identify which control technology the product expects. Integrated LED fixtures should list compatible controls in their installation instructions.
For replaceable lamps, buy bulbs that explicitly state they are dimmable. A non-dimmable LED on a dimmer can behave unpredictably and is not a practical shortcut. If you are replacing several lamps on one circuit, use the same model when possible. Mixing brands or different LED designs can create uneven fade behavior because each driver responds differently.
A basic LED-rated dimmer is appropriate for many line-voltage residential circuits. Low-voltage systems need more care. Magnetic low-voltage fixtures generally use an MLV-rated control, while electronic low-voltage fixtures commonly require an ELV control. A trailing-edge ELV dimmer is not interchangeable with every magnetic transformer setup. The fixture instructions and the control manufacturer's compatibility list should settle that question before installation.
Choose the right control for the room
In a bedroom, a standard slide or paddle dimmer can provide enough adjustment for overhead lighting. In a kitchen, consider separate controls for recessed ceiling lights, under-cabinet lighting, and decorative pendants. Dimming all three together often leaves the counters too dark or the pendants too bright. Good lighting design gives each layer its own job and, where useful, its own dimming zone.
Three-way switching adds another decision. If one light is controlled from two locations, you need a compatible three-way dimmer arrangement rather than installing a single-pole control without checking the circuit. Some smart dimmers require a neutral wire, while others are designed to operate without one. Homes built at different times do not all have the same wiring, so identify the wiring before buying a smart control.
Smart dimmers can be valuable when you want schedules, scenes, voice control, or operation from a phone. A Lutron Caseta system is popular for retrofit projects because many configurations do not require a neutral wire. Leviton Decora Smart and similar products can provide app-based control, but their wiring requirements and hub arrangements differ. The useful feature is not the brand name; it is whether the system solves a real access or scheduling problem.
Installation and safety details that matter
Turn off the circuit at the breaker, not just at the wall switch, and verify that the wires are no longer energized with a suitable tester. If the box contains unfamiliar wiring, aluminum conductors, heat damage, or more wires than the instructions describe, stop and call a qualified electrician. A wall box can contain multiple circuits, and a switch that looks simple from the front can be part of a more complicated arrangement.
A dimmer switch can generate more heat than a simple toggle because it regulates power electronically. Follow the manufacturer's derating instructions when several controls share one box. Some models require removal of side fins when installed next to other devices, which reduces their maximum load. Never exceed the rated wattage or the listed LED load, even if the lamps appear to be low wattage.
After installation, test the entire range rather than only the brightest setting. Watch for flicker at low output, listen for buzzing, and check that the light starts reliably every time. If the control feels unusually hot, trips the breaker, or produces a persistent noise, switch it off and investigate instead of accepting the behavior as normal.
Use dimming as part of a lighting layer
Dimming works best when it supports several types of light. In a living room, recessed downlights can provide general illumination, a floor lamp can support reading, and wall or cabinet lighting can add a softer visual layer. During a movie, the ceiling layer might be set low while the lamp near the chair remains comfortable. During a gathering, the ceiling lights can rise slightly without making the room feel clinical.
Consider color temperature as well as brightness. A 2700K lamp usually feels warm and residential, while 3000K can appear cleaner in a kitchen or bathroom. If your lamps shift noticeably in color as they dim, the dimming technology or lamp design may be responsible. High-quality LED products often specify a warm-dim feature, which changes from a cooler operating color toward a warmer glow at lower output.
Avoid using dimming to compensate for poor placement. A recessed light directly above a mirror can still create unflattering shadows when lowered. A pendant that is too small will not become visually substantial because it is brighter. First establish the fixture's location, beam spread, and purpose; then use the dimmer switch to fine-tune the experience.
A practical selection process
Before shopping, stand in the room at night and write down what feels wrong. Is the space too bright, uneven, hard to control, or missing a low evening setting? Then identify the circuit, count the fixtures, record the lamp types, and check whether the circuit is single-pole or three-way. This five-minute inventory prevents many return trips to the hardware store.
Next, choose compatible lamps and a control from the same compatibility information whenever possible. For a four-lamp LED circuit, a quality control may cost roughly $20 to $60; a connected smart dimmer can cost about $40 to $100 before any hub or installation expense. Those prices are small compared with replacing a ceiling fixture that was never the real problem.
The best dimmer switch is the one that matches the electrical system and gives the room useful range without noise or flicker. If you are uncertain about the wiring, pay for an electrician's installation rather than turning a lighting upgrade into a safety experiment. Once the hardware is correct, thoughtful scenes are easy: bright for work, medium for dinner, and low for the last quiet hour of the day.