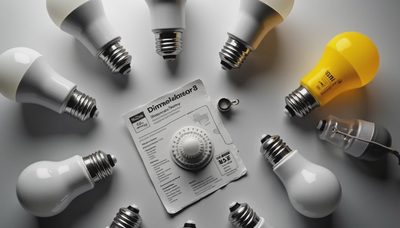
A recessed can lighting conversion kit can change the character of a room without opening the ceiling or replacing the electrical box. You keep the existing recessed housing, remove the old lamp and trim, then install a modern LED module or retrofit trim. The work is relatively contained, but the best result depends on more than choosing the brightest disk at the hardware store. Housing size, ceiling insulation, beam angle, color temperature, glare, and dimmer compatibility all affect how the finished room feels.
As a lighting engineer, I think of this upgrade as a small optical renovation. The fixture is still in the same hole, but the light source, distribution, and visual comfort can change dramatically. A careful retrofit can make a kitchen brighter at the counters, a living room calmer, or a hallway less patchy after dark.
Start with the Existing Housing
Before buying anything, identify the can's nominal diameter. Most residential housings are 4, 5, or 6 inches, with 6-inch cans still common in older construction. Measure the inside opening rather than the outside flange, and look inside the housing for a label showing the manufacturer, model, voltage, and insulation rating. A 5-inch conversion kit will not properly fit a 6-inch housing simply because the trim looks close in size.
Next, determine whether the housing is IC-rated. IC means insulation contact, so the can is designed to sit against attic insulation. If the fixture is not IC-rated, insulation must generally remain clear around it according to the installation instructions. Also look for an airtight rating. An airtight housing limits air movement between the conditioned room and the attic, which can improve energy performance and reduce drafts.
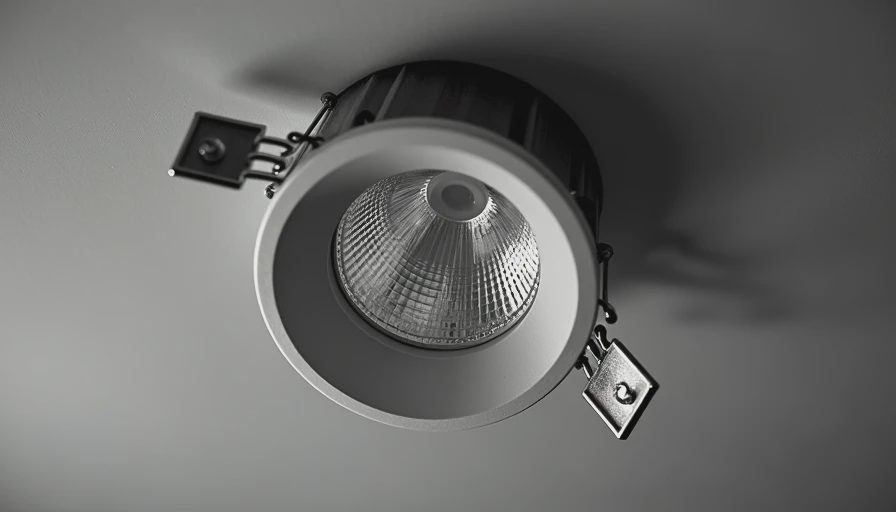
A compatible kit should attach using the existing socket adapter or spring clips. If the old can is badly bent, loose, rusted, or damaged by heat, a retrofit may not be the right repair. Replacing the housing, or having an electrician inspect it, is safer than forcing a new trim onto unreliable hardware.
Match Light Quality to the Room
Lumens describe how much light a fixture produces, but lumens alone do not tell you whether that light will be pleasant. A 900-lumen LED can feel harsh if its beam is narrow and its glare is visible from the sofa. In a kitchen, 800 to 1,100 lumens per six-inch opening is often a practical starting range, depending on ceiling height, spacing, cabinet finishes, and the amount of daylight.
Color temperature is the warmth or coolness of the light. Around 2700K resembles a warm incandescent lamp and suits bedrooms, dining rooms, and relaxed living spaces. Around 3000K is a useful middle ground for many kitchens, baths, and open-plan interiors. A 4000K lamp appears noticeably cooler and can work in a garage or utility area, but it often feels clinical in a residential room.
I also pay attention to color rendering. Look for a CRI of 90 or higher when the room contains wood, artwork, food, or fabrics whose colors matter. Brands such as Halo, Juno, Lithonia, and Philips offer retrofit products in several color temperatures and trim styles, but the model family matters more than the logo. A high-CRI, 3000K fixture with controlled glare can outperform a brighter, cheaper fixture that makes every surface look flat.
Choose the Beam and Trim Deliberately
A retrofit trim is not just a decorative ring. Its reflector and lens shape determine where light lands. A wide beam spreads illumination across a living room, while a narrower beam can emphasize a kitchen island, fireplace, or textured wall. If the ceiling has many existing cans spaced close together, a wide distribution usually prevents overlapping hot spots.
Baffle trims use ridges to absorb some stray light and reduce the visual sharpness of the source. They are forgiving in bedrooms and family rooms. Smooth or reflector trims can look cleaner and deliver a more precise appearance, but they can also reveal glare when viewed from a low seating position. Gimbal trims allow aiming, which is useful for sloped ceilings or artwork, though they should not become a substitute for proper fixture placement.
A recessed can lighting conversion kit with a white trim may disappear into a white ceiling, while a black baffle creates a stronger architectural accent. Neither choice is universally correct. Stand in the room at night and note where your eyes naturally rest. If you can see a bright LED point from every chair, prioritize a deeper lens or low-glare design.
Verify Dimming and Controls
Many homeowners discover a retrofit problem only after installation: the lights flicker, buzz, fail to turn fully off, or drop out at low dimming levels. LEDs draw far less power than incandescent lamps, so an older dimmer may not communicate with them correctly. Choose a dimmer listed as compatible with the exact fixture or product family. Lutron LED+ models are commonly used in residential projects, but compatibility still depends on the fixture and wiring.
If several lights share one switch, confirm that the dimmer's minimum and maximum load ratings suit the installation. A fixture labeled dimmable is not a promise that every dimmer will deliver smooth, silent performance. For a bedroom or media room, test the lowest useful setting before installing all the trims. Smooth dimming from full light to a soft evening level is often more valuable than another 200 lumens.
A recessed can lighting conversion kit may also include selectable color temperature, allowing settings such as 2700K, 3000K, and 4000K. That flexibility is helpful during a renovation, but set the switch once you understand the room. Constantly changing color temperature can make adjacent fixtures look mismatched.
Installation and Safety Checks
Turn off the circuit at the breaker, not only at the wall switch, and verify that the fixture is no longer energized. Remove the old lamp and trim, attach the supplied socket adapter if required, and follow the manufacturer's instructions for springs, clips, and insulation clearance. Do not modify wiring or bypass a junction box to make an incompatible product fit.
Heat is another reason to use the listed product rather than improvising. LEDs run cooler than incandescent lamps, but the driver still needs the clearance and airflow specified by the manufacturer. A kit that is IC-rated and airtight is often the simplest choice for an insulated ceiling. If the housing has loose connections, scorched insulation, aluminum wiring concerns, or no visible grounding path, stop and use a licensed electrician.
After installation, test every light at full output and several dimmer levels. Check for flicker through a phone camera, listen for buzzing, and inspect the trim from normal seating and standing positions. These small tests catch problems before the ceiling is fully furnished and the ladder is put away.
A Practical Buying Checklist
For a typical six-inch living-room retrofit, I would record the following before ordering: the actual housing diameter, IC and airtight status, desired color temperature, approximate lumen output, trim color, beam preference, and dimmer model. Then confirm that the product is listed for the existing housing and ceiling conditions. If the room has artwork, choose a model with a compatible gimbal or adjustable aiming feature instead of angling a fixed fixture through a crooked opening.
Buy one sample before purchasing a full set. Install it beside an existing light and view both during daylight and at night. Compare the shadow under cabinets, the color of wood floors, and the brightness on nearby walls. A $20 to $60 sample can prevent a costly box of fixtures from producing the wrong atmosphere.
The best recessed can lighting conversion kit is the one that solves the room's actual problem: poor color, excessive glare, weak task light, dated trim, or unreliable control. Measure first, select the optics and color intentionally, and treat dimming as part of the design rather than an afterthought. That approach turns a simple retrofit into lighting that feels considered every evening.